The Best U.S. State Capital Games for Student Study

This is a collection of the best games I’ve found for student to practice identifying all of the state capitals on a map. Students who are competitive especially love playing the first game over and over again to see if they can beat their best time.

Important note: “In 2020, Flash dies for good. Adobe’s media format defined a certain era of the internet, but security vulnerabilities and HTML advancements have rendered Flash obsolete. Adobe announced the end of support way back in 2017, and all major browsers will remove Flash entirely by December 31, 2020. When that happens, tens of thousands of Flash games will be gone from the internet forever.” I’m not sure if replacements will be published in place of the original games linked below, but in January 2021, some of these links may no longer work.

Time Challenge

In this game, you are given the name of the capital and you must click on the corresponding state. Challenge your students to identify all states in under 2 minutes.

Screen Shot 2018-05-08 at 6.55.35 PM.png

U.S.A Level Two

Pick the correct state for the highlighted capital. Click on the image to play. 

Screen Shot 2017-05-08 at 8.36.34 AM.png

U.S.A Level Three

Pick the correct capital for the highlighted state. Click on the image to play. 

Screen Shot 2017-05-08 at 8.38.56 AM.png

U.S.A Level Four

Type the first three letters of the state capital for the highlighted state. Click on the image to play.

Screen Shot 2017-05-08 at 8.40.51 AM.png


Looking for Mystery Skype Connections

My 5th graders in CA are looking to connect with classes east of the Mississippi River for Mystery Skype. If you’re a teacher and interested in scheduling one with us in the next few weeks, sign up here!

Mystery Skype is a fun and engaging way for students to learn geography and broaden their worldview. It also provides students with an opportunity to sharpen interpersonal and critical thinking skills. My students love it!

I’m happy to explain how it all works if you’ve never done it before. If you know a teacher who might be interested, please share this with them. We are open to scheduling with any age group and size.

The Compliments Project

the-compliments-project

I read this post on The Cult of Pedagogy’s blog over the summer. It’s about a teacher who began a project she called “The Compliments Project” and later renamed to “Spread the Love”. I absolutely loved the idea and purpose of this activity and knew I wanted to incorporate it in my class at some point this year. I hope you read this and decide to use it in your class, too!

You can read the original post (linked above) to get the backstory.  My goal is to post the resources I created to go along with the activity so they can be reused in your classroom. I liked the ring of “The Compliments Project”, so I’ll be referring to this activity as such from now on. Below you will find an overview of the project as executed in my classroom.


Purpose of the Compliments Project

  1. Vocabulary – gratitude, thankful, appreciation, compliment
  2. Students learn to generate thoughtful compliments focused on character
  3. Students develop an understanding that giving compliments is just as uplifting as receiving them
  4. Students will feel recognized and appreciated


The Compliments Project In Action

I created the following PowerPoint to introduce students to The Compliments Project. It highlights key vocabulary, examples of compliments focused on character, and includes a brief overview. A slide for reflections as well as a slide to close the activity are also included.

  • Slides 1-4 introduce the project to students. When on Slide 3, have students practice creating compliments focused on character by sharing compliments for their parents. I found that students find complimenting appearances and possessions easy, while complimenting how someone makes you feel and recognizing personality traits is a little more challenging.
  • Slide 5 kicks off The Compliments Project. Ask for a volunteer to be in the “hot seat”.

This is where I made a few changes. Since I’m working with younger students, I decided to have the student in the “hot seat” sit outside of the classroom while we wrote compliments on the SmartBoard. I also gave students a piece of scrap paper and invited them to brainstorm compliments for their classmate on the paper first. This was helpful, as students were able to create several compliments and then choose 1 or 2 of their favorites to write on the board. Last, since I have a SmartBoard, students aren’t able to write on the board at the same time. Unfortunately, this meant that the project took a little longer that it would have if I had a whiteboard instead. Still, the time was well worth it! I invited three students up to the board at a time so they could quickly transition.

When we were done, we invited the student in the “hot seat” back into the classroom. This student was directed into the classroom with eyes closed and took a seat facing away from the board and towards the rest of the class. Another student was selected to summarize what occurred while he/she was outside and then invited our compliment subject to turn towards the board for the BIG REVEAL. The student in the “hot seat” then read the compliments aloud. It’s important that the student read the compliments aloud rather than just look them over…this part is particularly rewarding for the rest of the class. Just wait until you see the gigantic smiles on your students’ faces!

  • Slide 6 was used after the activity. I went back to these two questions after each student was in the “hot seat” to really drive home the impact of giving and receiving compliments. I also loved hearing the students reactions and responses.
  • Slide 7 is the big takeaway. I also challenge students to offer at least one other genuine compliment to someone throughout the day.

After The Compliments Project

Screen Shot 2016-11-07 at 8.51.33 AM.png

I printed two copies of the compliments we brainstormed (see example above). I laminated one copy and taped it to the front of the our classroom door. The other copy was given to the student to take home. I wrote the following note on the back of the print-out.

We are so thankful to have you in our class. Post these compliments above your bed or by your mirror, someplace where you can see it each day, so you can be reminded of how awesome you are and how much we all appreciate you. 

I also laminated Slides 1 and 2 and put them on our front door as well. Each student’s compliments were added to the door, along with a picture of them in front of their compliments on the board. I recommend doing the same someplace in your classroom.

The Compliments Project is MOVING, UPLIFTING, and INSPIRING. Try it in your class and be a part of teaching and spreading positivity. 

A big thank you to Stephanie MacArthur who was willing to share this idea with other teachers. The more we share, the better we become!

Teacher Hack: Mystery Skype Wall Map

Keep track of your Mystery Skype visits with a Mystery Skype wall map in your classroom.

mystery-skype-wall-map

Last year, I wanted to keep track of my 5th grade Mystery Skype visits with a large wall map, but I didn’t want it to be a costly expenditure. I created the above map (3ft by 2ft) by using just what was available in my classroom. As we visited different states, we highlighted it on the map and added a flag, labeling the city and state. It was an easy way to keep track of our visits, and we were easily able to add multiple flags within the same state.

Click HERE to print a large map. I chose the 3 x 3 “USA continental” map and then drew an outline of Canada and Mexico. I then printed Alaska and Hawaii separately and added them to the map. The link I provided also offers a printable USA map with Alaska and Hawaii included if you’d prefer it. I chose the former because it allowed me to include bodies of water and adjacent countries.

Mystery Skype Wall Map Flag.jpg

Regular school glue will dry white, and I didn’t have any problems with it holding the eraser flag while it hung on the wall.

Historical Fiction Book Clubs – Free WebQuest

We’re starting historical fiction book clubs in my class this week. This will be the first year I’m doing books clubs for the historical fiction genre – we read Blood on the River as a whole-class novel study and I usually move on to another genre afterwards. This year, I’m doing great on time and have the opportunity to add another club. Historical fiction is one of my favorite genres, and it’s one that kids tend to look over most frequently when searching for a book in my classroom.

I’m thinking I’ve found some great books to hook them! Sophia’s War, The Sign of the Beaver, The Mostly True Adventures of Homer P. Figg, and Zane and the Hurricane all made the cut.

5th grade historical fiction book clubs.png

I put a WebQuest together for students to complete before beginning their assigned novel. The students click on their assigned book and then progress through four steps. Within the WebQuest, students read the information from the back of the book and analyze the cover to make predictions, learn more about the author of their novel, and learn some important historical background information. Click here to view my Historical Fiction Book Club WebQuest. It’d be a long and boring post if went through each step to complete the WebQuest, so I won’t do that. It’s self explanatory – my 5th graders completed it yesterday and all went smoothly. I had them work with partners which made if more fun. They were able to discuss each section and hear another person’s ideas; I loved the conversations I heard as I circled the room. We got through the first three steps in class and students completed the fourth step for homework. I hope you can use all or part of it with your class. Click through and explore!

I hope to post the guide I created for Sophia’s War soon. I just have to proofread it before sending it out into the world with my name on it. 😀

Looking for another 5th grade historical fiction recommendation? As I mentioned earlier, we read Blood on the River as a whole-class novel study. This is a fantastic book that pairs wonderfully with 5th grade Social Studies. If you’re looking for another great historical fiction novel to use, Blood on the River is the best! My class loves it each year.

My First Official (Published) Educator’s Guide! – A Teacher’s Guide to Novels by Lisa Graff

The Lisa Graff educator’s guide that I created for Penguin is out! Over the summer, I was excited to be contacted by Penguin to write an educator’s guide to 5 novels by Lisa Graff. I was told that the guide will be printed and distributed by Lisa Graff when she visits schools or attends conferences.

I’ve already been creating and sharing guides and other work on this blog just because I feel it further validates the time I put into my work. I figure if I’m working hard to create it, others mine as well be able to benefit from it too—it’s been great to see that the guides on my website have been viewed and downloaded (and hopefully used) several hundred times. The opportunity to create a guide for Penguin excited me because I’d be able to create something that could reach and help a wider audience. Considering that I also enjoy doing this sort of thing, I readily agreed.

I submitted my work to Penguin a couple months ago, and just received the finalized PDF. Since it took a little while, I’d gotten nervous that maybe something was wrong with what I submitted. BUT, I’m thrilled to see that they kept it exactly as I submitted it…guess that means they were pleased. 🙂

Lisa Graff Teacher Guide

Click HERE to view and print the entire guide. 5 guides, aligned to the Common Core State Standards, are included to the following novels: A Tangle of Knots, The Life and Crimes of Bernetta Wildflower, Double Dog Dare, Lost in the Sun, and Absolutely almost. Each guide includes a short summary, theme listing, vocabulary, and breakdown of questions to ask before, during and after reading the novel. The questions in the “before” section would best be used in a discussion format and include information a child must know before reading the novel in order to best access the story. The “during” questions can be used to guide discussion groups and check grade level understanding throughout the novel. When relevant, page numbers are included to make it easier for you find answers to the discussions questions and enable you to ask questions at a suitable time. The “after” questions engage analysis and are appropriate to utilize after the completion of the novel.

I’ve posted other resources for Absolutely Almost to my blog in the past. Click the links below to access related material.

Absolutely Almost Read Aloud Guide – This guide is a bit more in depth than the one I submitted to Penguin. I completed this guide before reading the book as a read aloud with my class last year. The link to the guide is provided at the bottom of the post.

Resources to Use with Absolutely Almost – Within this post, you will find links to a few resources I created to be used with Absolutely Almost: a protagonist character web, “helpful hints” printable, and supporting character character web.

Students Write About Feeling “Absolutely Almost”

Absolutely Almost Writing Connections Printable

Absolutely Almost Author Skype with Lisa Graff – You can arrange a time and date for Lisa Graff to Skype with your class. My class had a memorable experience!

Student Poetry Activity after the Completion of the Novel

Stay up to date with new resources posted to 5th Grade Files…subscribe to my blog! Click “subscribe” in the right sidebar.

Poet-Tree and Green Space

I can’t believe I’ve never posted about Poetry in the Park before. If you have a nearby park or even a grassy area at your school to take your students, I urge you to provide your students with these outdoor writing experiences.

20150918_114045

I’ve read several articles about the importance and benefits of green space in learning, as well as how it can help students with distractibility. According to one article, “When kids with ADHD spend time outside or looking at nature, it increases their ability to pay attention and control their impulses”. Last year a like-minded teacher and I began bringing our students to the park once a month for an outdoor writing experience. For these trips, we give a short mini-lesson in the classroom and then walk the students to a nearby park. Once at the park, they select their own personal space to work. They separate and set in on their assignment. Students love this writing experience and I do too, as it’s very rewarding to the students and teacher; the work they produce at the park is consistently astounding! Students are so engaged. They’re encouraged to use their senses at the park to inspire their writing.

Each season, we complete seasonal “five senses poetry”. I’ll be sure to post about this later. This year, we’ve already written about Summer and we’ll be writing about Autumn next visit. On our most recent visit we wrote cinquain, diamante and windspark poetry. Pairing our writing with our current Life Science unit, students focused on environmental topics and used their surroundings and what they’ve learned in Science to inspire them. I split my class in groups so they could each visit a tree to make observations. Together, they came up with a list of adjectives to describe their tree. We then split up into our individual spaces. We called this park session “Poet-Tree”.

My class, investigating their trees.

My class, investigating their trees.

Here is my latest Poet-Tree in the park guide. I’ve provided screenshots, but you can download the document via a link at the end if you’d like.

Students visited a tree together and completed the first page of their Poet-Tree guide together. See first page below…

Poet-Tree

Students then found their own personal outdoor space and completed a poem on the palm tree they just investigated using the following guide for cinquiain poems:

Cinquain Poems

Student samples from my class:

Screen Shot 2015-11-01 at 1.45.51 PM

When finished, they went on to complete a diamante poem. They could choose to write about any environmental topic.
Screen Shot 2015-11-01 at 1.24.04 PM

Student samples from my class:

Diamante Poems

Finally, they worked on windspark poems, another poem of free choice, as long as it had something to do with the environment. These are my favorite!

Windspark Poems

Student samples from my class:

Windspark Poems

Before finding their own private space to complete their poetry and after completing tree brainstorming as a group, they received the following brainstorm list. This was provided to help trigger ideas as students completed the diamante and windspark poems.

Outdoor Brainstorm List

Click the following link to download this booklet – Poet Tree – 5th Grade.

Next Gen 5th Grade Life Science Phenomena: Plant Growth in Unlikely Places

Below is a PQP chart and phenomena video I created to target a 5th grade Next Gen Science standard in Life Science. I’m excited about the Next Gen standards, as the framework simply makes sense. Learning in Next Gen is driven by asking questions and defining problems. Units of study begin with phenomena that engage learners and pique their curiosity. Each phenomenon leads to a driving question that encourages research, investigation, experimentation and problem solving to reach a conclusion.

Feel free to use the resources below with your 5th grade kiddo(s).


Life Science – Grade 5 – 5-LS-1

PQP Chart:Screen Shot 2015-10-18 at 12.52.28 PM

Phenomena Video:

This video can be used in class or given for homework. Continue reading

Student-Centered First Day of School

-I think this was the best first day of
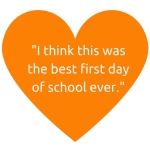
Today, when one of my students left for pickup, I overheard him sharing, “I think this was the best first day of school ever.” My heart warmed and it got me thinking…what was so different about this first day than those in his previous years? 

Well, traditionally, the first day of school for elementary students involves A LOT of listening – listening to the teacher introduce herself, listening to the teacher talk about the rules, listening to the teacher talk about the classroom and explain how it will operate, listening to explanations of procedures, etc. And let’s not forget the first day getting-to-know-you ice breakers. When I was younger, I dreaded the first day of school routines. Although I always felt ready for the first day and I was always eager to see my friends, I just wished I could skip the humdrum of the first day of school. In an effort to prevent my students from feeling as I did, I work to involve my students as much as possible on the first day of school (and always). I intentionally choose activities that get them up and out of their seats.

Today was the first day of school for me and my 5th grade kiddos. At the end of the day, my students left the classroom with energy, excited and eager to come back for Day 2. They left with energy because they had a first day that included a lot of movement and they played an active role in getting to know the classroom. Instead of being talked at throughout most of the day, they were involved and responded to.

The most successful and engaging part of the day was when my students toured the classroom. I recommend you give this a try!

STUDENT-CENTERED CLASSROOM TOUR
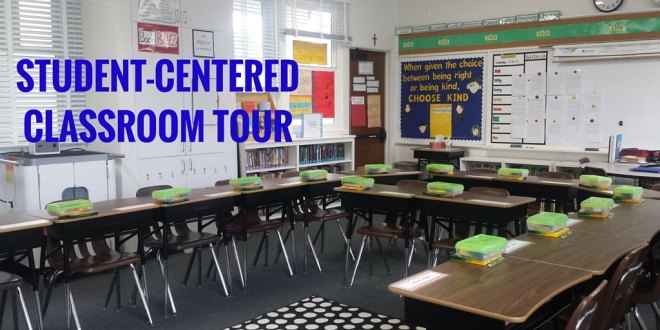
Student Centered Classroom Tour

I begin by asking my students if they think someone would be able to learn about them if that someone visited their bedrooms. This leads to a great discussion about what we can learn about someone by noticing things around his or her room. We can learn about what they like, what they value or what they find important. I then ask the students if they think the same applies to a teacher’s classroom – do they think they can learn more about me and the classroom by looking around and making observations. They, of course, determine that they can.

I hand my students a piece of paper and a clipboard. At the top of the page they write, “Observations:”, and about two-thirds of the way down the page they write, “Questions:”. Then, I explain that they will have the opportunity to tour the classroom. They, on this occassion only, are invited to open up any cabinets they’d like and look around. Besides the one locked drawer I have, everything is fair game. This alone excites them. I explain that I want them to make as many observations as they can and I want them to try their very best to come up with two questions.

Now, they are allowed to talk during this activity, but for about 15 minutes my room was nearly silent. They loved it and were fully engaged! They really took their time to check things out thoroughly and had fun trying to guess the purpose for different things around the room. During this time, I didn’t answer any questions. I’d invite students to write them down and explained that we would get to them later.

After about 15 minutes, I called my students back together. First, they shared their observations. During this time, I was also able to share expectations for group conversations without being preachy; it happens naturally as students discuss. Then, the best part! Time for questions. During this time, students will ask every question that you’d want to respond to in order to give them an overview of the room and your policies. The class eats this question and answer session up! Throughout it, they are smiling, laughing, and asking follow up questions. I believe they particularly like this activity because they own the time; they’re leading the questions and it makes them feel important. Really, they’re just giving me an opportunity to share all the information I’d want to share anyway, but now, they’re participants instead of recipients. It takes a maximum of two minutes to respond to any questions and then the floor belongs to the students again.

This student-centered approach to a typical first day energizes students. They also remember much more than when using the alternative approach – talking at the students as you go over the important first day info. Rather than getting that glossed-over-tired look, you get smiles, participation and ultimately, retention; they’re involved, so they remember.

For those of you who haven’t yet had your first day, I wish you the best!

Use an Interactive Game to Hook Students to US History

I thought I’d made the greatest find of the summer when I discovered BiblioNasium a few weeks ago. Little did I know, I’d discover a free interactive online program for American History, chock-full of supplemental materials including a teacher’s guide, learning goals and national standards alignment. Mission US is an interactive role-playing game that can be used with your US History class. I ran through the game myself, reviewed the teacher materials, and plan to use it with my 5th grade kiddos in class this year. Read on to learn more about the game and how it can be used in your classroom.

Mission US Promo Video

WHAT’S THE PURPOSE?

The purpose of Mission US is to engage students in 1770s Colonial America through a first person experience. Students learn vocabulary and meet important historical figures along their journeys. As students navigate through the game, they make choices that affect the outcome. So, students will experience different outcomes depending upon the choices they make within the game. Fun!

HOW DOES IT WORK?

For Crown or Colony Screenshot

Mission US: For Crown to Colony is set in prerevolutionary Boston and leads up to the Boston Massacre. The game is split into 7 sections, including the prologue and epilogue.

Each gamer assumes the identity of Nat Wheeler who leaves his farm to become a printer’s apprentice in Boston. Through Nat, students learn about prerevolutionary Boston by interacting with characters, completing tasks and making decisions on Nat’s behalf.

Below is a breakdown of the story, taken from Teacher’s Guide: Mission 1: “For Crown or Colony?” At a Glace which is available within the extensive supplementary teacher materials on the Mission website. With the exception of the epilogue, each section contains a task for students to complete and tackles new vocabulary and concepts.

Mission US Story Guide

*Story breakdown was taken from the Teacher's Guide "For Crown or 
Colony?" available on the Mission US website.
HOW CAN I USE IT IN MY CLASSROOM?

As suggested within the teaching materials on the Mission US website, Mission US is best used as a hook or jumping-off-point of a new unit of study. Used in this way, the game will engage students and expose them to new vocabulary, events and important people of the time period.

I’m fortunate to have access to a laptop for each student in my class, so I plan to install the downloadable version on each student’s laptop (to allow for better streaming) and continuously use it as a hook as we progress through our unit on Colonial America. You could also place the game at a station and have students cycle through, have students work in pairs and make decisions together, or assign it for homework. Though, I’ll speculate that the potential for this program to improve student engagement and the quality of class discussions would be far greater with in-class use.

Here’s a video that shows how one teacher used the game with her middle school class.

DON’T INCORPORATE TECHNOLOGY INTO YOUR CLASSROOM JUST BECAUSE IT LOOKS JAZZY

Make sure to consider the benefits first. Not sure if this program will actually benefit your student’s learning? Use the When to Use Technology checklist to better evaluate whether Missoin US may be a good fit for your class.

Screen Shot 2015-08-09 at 10.37.46 AM

It’s a rarity to find such a purposeful, user-friendly, educational game like this available for FREE. Usually the catch is that free resources are packed with advertisements, but that’s not the case with Mission US. Another great summer find! We won’t be ready to use this program in my class until December, but I’ll let you know how it goes!